Chord transitions
Smoothly transitioning from chord to chord can be one of the most difficult challenges for a beginning guitarist. These transitions will become second nature with time. When first learning, it can be helpful to break transitions down to the micro level. We will use techniques such as common fingers and similar shapes between chord shapes to help us move between them as efficiently as possible.
Common fingers
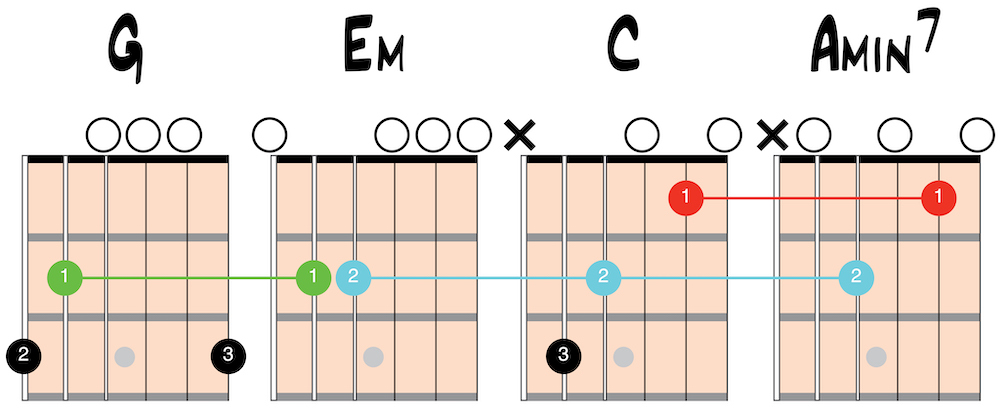
A common finger is a finger that does not change fret or string when transitioning chords. An awareness of common fingers is the first step toward creating smooth chord transitions by avoiding excess motion. Practice the following chord progression slowly and intentionally, making sure not to lift the common finger.
G to Emin: Use fingers one and two to play Emin. This creates a first-finger common finger at the fifth-string second-fret. (You may need to slide the first finger slightly toward the first fret in order to place the second finger on the fourth string).
Emin to C: Keep the second finger at the fourth-string second-fret.
C to Amin7: The first and second fingers are both common fingers. Simply lift the third finger for this chord transition.

Three steps for smooth chord transitions
Smooth chord transitions are one of the trickiest things for many beginning guitarists. One way to break down chord transitions is to think of these three steps. The eventual goal is to place each finger in a chord shape quickly and at the same time.
Step one: each finger separately
This is a natural starting point for most beginners. When changing chords, you will lift and reposition each finger separately. This method creates a time gap in the strum pattern while transitioning chords. Ultimately, it is slow and inefficient.
Step two: “groups” of fingers
Look for “groups” of fingers that are similar between chord shapes. Sometimes these shapes are obvious and sometimes they are a bit tricky to find. Move the groups of fingers together as a shape. The next two pages will guide you through examples of applying this step.
Step three: groups at same time
The final step is to move groups of fingers at the same time. In some cases, movement of one group past another group will create opposing motion. The end goal is to place all fingers used in a chord down on the fretboard at the same time.
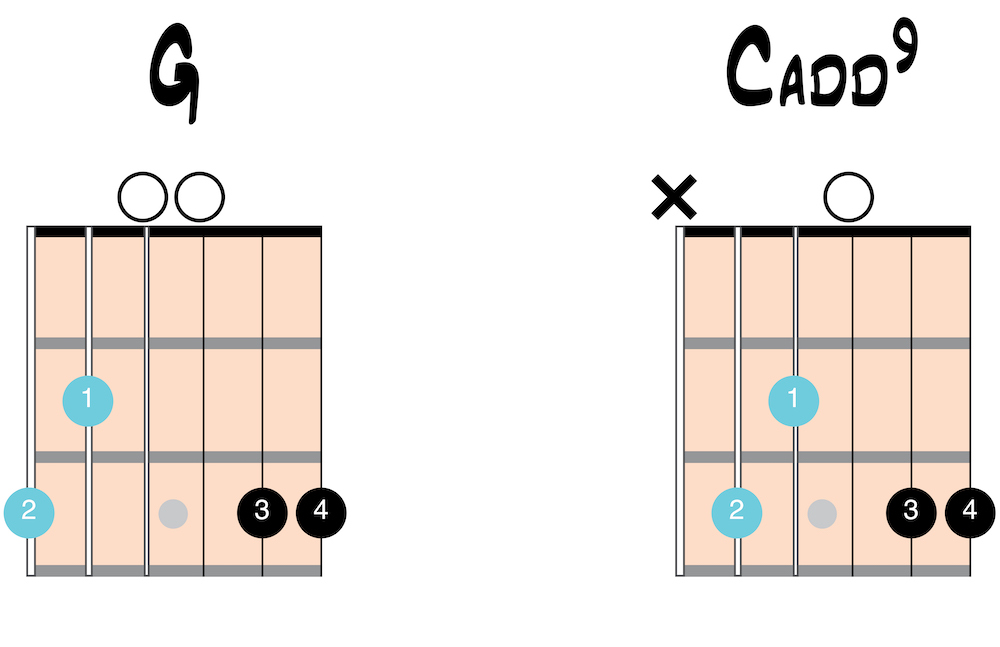
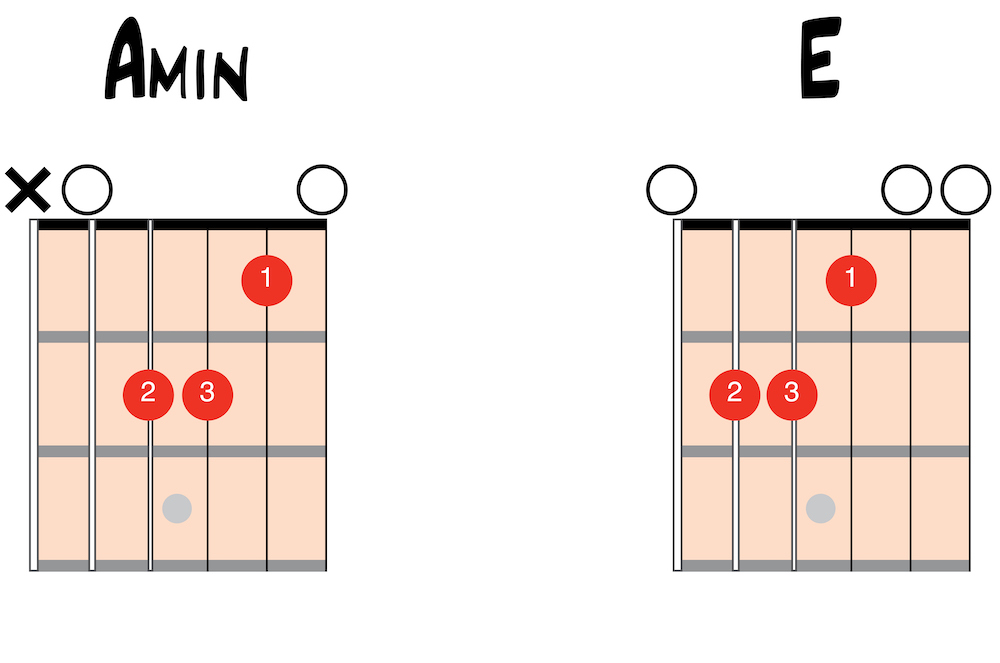
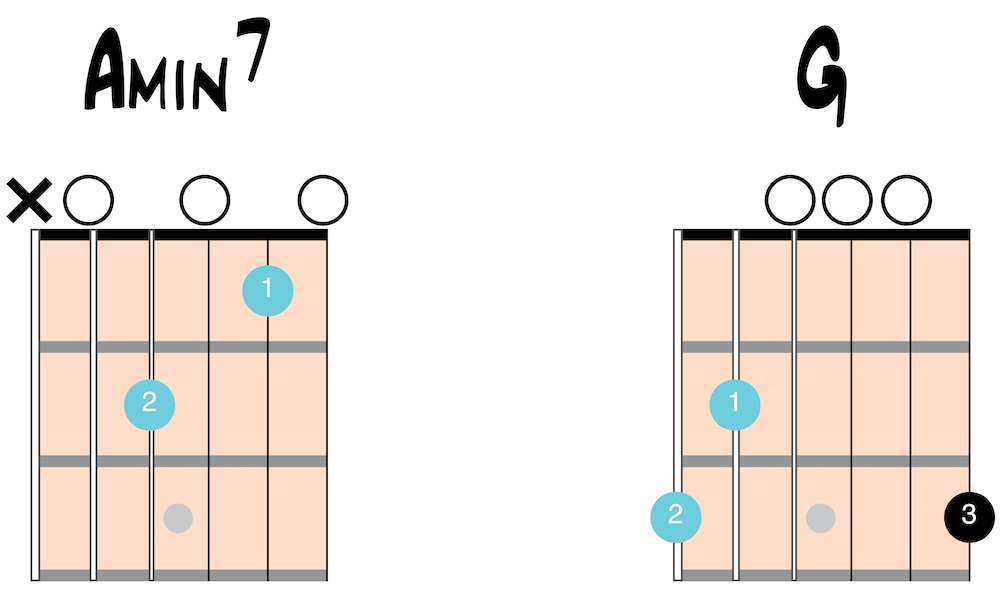
Applying step two: “groups of fingers”
Transition from the four-finger G to Cadd9 by moving the first and second fingers together as one:
Transition from Amin to E by moving the first, second, and third fingers together:
Transition from C to D by moving the second and third fingers together from the fifth and fourth strings to the second and first strings:

Transition from Amin7 to G by moving the second and first fingers together from the fourth and second strings to the sixth and fifth strings. This transition will also require you to “collapse” the fingers from non-adjacent to adjacent strings.
These “groups of fingers” transitions are a starting point. Find your own groups of fingers to smoothly transition within any chord progression.
Back: Power chords Next: Easy songs to learn